
Robinson Cattle Co Pty Ltd Safety Induction
WORKING OUTSIDE AND REMOTELY
Preoperational Safety Checks
- Perform your prestart check of oil, water, tyres, lights and battery, ensure you know some basic mechanics and stay with the car if it breaks down
- Check weather conditions
- Always wear long sleeved shirts, long trousers, farm work boots and a wide brimmed hat, shorts can be worn unless otherwise insturcted
- Ensure UV protection with adequate sunscreen, hat, clothing and sunglasses.
- Take adequate water and food supplies, at least 10L of water per person
- Ensure that you have a working UHF prior to leaving the homestead
- Ensure that somebody knows where you are going and what time you are expected to return
- Ensure you have a first aid kit in your vehicle
Operational Safety Checks
- Have someone accompany you on your first trip
- Do not work at heights, such as windmill platforms unless you have edge protection or use a harness
- Ensure the area is clear of overhead powerlines, trip hazards, old fence lines etc
- Keep an awareness of snakes, feral animals and dangerous insects
- Perform heavy duty activities at the coolest time of the day
- If it is cold, wear warm clothing
- If you are to get wet, ensure you have gumboots and replacement clothing available
- Do not attempt to drive through flooded waters
- Maintain audio and visual communication and adhere to the specified exclusion zones
POTENTIAL HAZARDS IDENTIFIED
|
Loss of orientation |
Consult a property map, be confident in your comprehension of directions, always have a fully charged and operational UHF |
|
Mechanical Failure |
Always perform your prestart check |
|
Dehydration/Sunstroke |
Ensure you have adequate food and water supplies to compensate for any unforeseeable events. Wear relevant sun safe clothing (wide brimmed hat, long sleeved shirt and trousers, sunglasses and sunscreen) Schedule work for the cool. Rest in the shade if feeling unwell. Make contact immediately if feeling significantly dehydrated/under heat stress |
Please note that no employees are to use this equipment prior to:
- Having practical training under supervision
- Obtaining competency in the correct use
- Demonstrating adequate safety understanding
Heat stress is generally not desirable, and should be avoided where possible.
The body’s temperature rises normally during hard physical work but is
controlled mainly by cooling through the evaporation of sweat through the
skin. The harder the work, the higher the body temperature and the greater the
sweating. The body temperature is controlled by adjustments in sweating over
a wide range of environmental conditions. As the environment gets hotter, this
places added load on the blood circulation and there may be a further rise in
body temperature. The sweat lost in cooling will result in dehydration unless
replaced by drinking water. Heat stress commonly occurs due to:
- Physical work and activity
- High air temperatures
- Radiant heat such as heat from the sun, from a fire or from machinery
- High humidity
- Limited air movement
- Clothing and/or equipment
of the worker, the work process, the environment and the interaction between
them which increase the risk of heat stress.
Characteristics of the worker to consider are:
• Ill health, particularly heart or skin disorders
• Poor physical condition
• Overweight
• Age
• Dehydration
• Hangovers from excess alcohol and other drugs.
Characteristics of the work process to be considered are:
• The level of physical exertion required for the task
• Time of the day in which tasks are done
• The length of time spent working during hot weather
• The season in which the work takes place.
• The amount of air movement
• Humidity level
• Air temperature
• Amount of radiant heat such as heat from the sun, a fire or machinery
• Presence of shade; artificial or natural
• The extent of reflection from work surfaces or water
● Ill-effects of heat can range from mild heat exhaustion to heat collapse which may
progress to heat stroke. Severe heat stroke, particularly in older people can cause
death.
The Progression of Heat Stress
● Discomfort which may result in inefficiency, inability to continue with the days
work and irritability.
● Reduced work capacity and productivity levels due to loss of concentration and
fatigue.
● Increased incidence of injury and damage to equipment due to fatigue, poor
concentration and unsafe work practices such as rejection of protective equipment.
● Disorders such as dehydration, heat exhaustion and heatstroke. At this stage, body
temperature will be high as sweating stops. Loss of consciousness may occur
✓ Self pacing. Work at a comfortable pace and take regular rest breaks.
✓ Self monitoring. Be aware of your own responses and feelings when
working in hot conditions. If you feel unwell, stop work and move
into cooler conditions immediately.
✓ Drink frequently. Water is the best choice.
✓ Work plan. Schedule heavy work for early in the morning or late
afternoon to avoid the hottest part of the day and take a longer break
in the middle of the day. Share the workload and alternate hot work
with cool work. Try and plan ahead for work to be done in the cooler
months.
● Any feeling of being unwell in the heat should be taken seriously and taken as a
sign to stop work immediately and retire from the heat. Generally, with rest, cooling
and drinking, recovery is rapid and uneventful although the victim should not return
immediately to the hot situation.
In more serious cases, you may need to assist the affected person by:
● Removing the victim from the heat and lying him/her
down in the shade.
● Removing as much as clothing as practicable.
● Cooling by sponging the skin with water and fanning.
● Encouraging to drink cooled but not cold water.
● Raising the legs if the victim is dizzy.
● If recovery is not evident, medical aid should be sought quickly. During this time
cooling must be maintained as continued high body temperature may result in
heatstroke which can be fatal.
- Do not operate vehical in an unnesiserey manner, for example burnouts or fast offroad driving. This will result in instant dismissal.
POTENTIAL HAZARDS IDENTIFIED
|
Collision |
Observe the exclusion zones. Exercise vigilance towards all personnel, vegetation, buildings and road conditions |
|
Bogging |
Observe changed road conditions after weather events. Ensure you have good communication for backup assistance. Always try to take an alternative safe route. |
|
Mechanical Failure |
Always perform your prestart. Observe any abnormalities whilst running. Always report faults. |
Please note that no employees are to use this equipment prior to:
- Having practical training under supervision
- Obtaining competency in the correct use
- Demonstrating adequate safety understanding
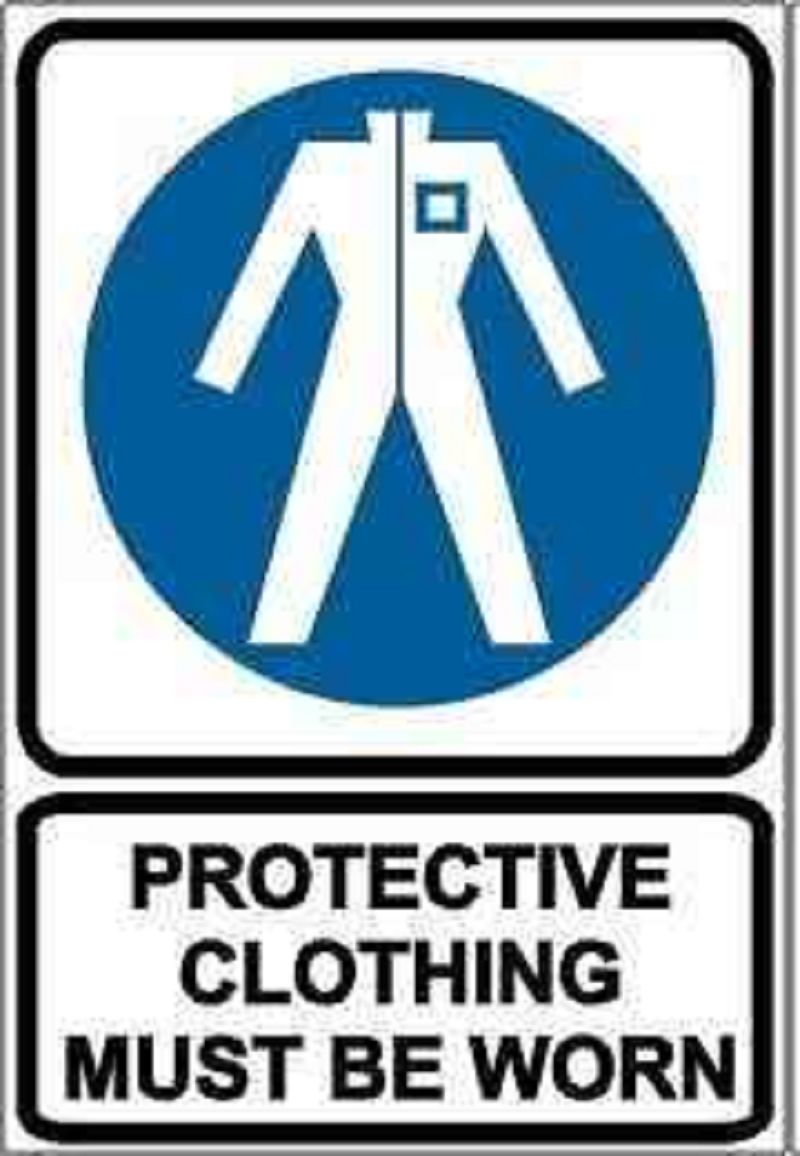
- Protective Clothing
- Covered Boots
- Widebrim Hat/Sunscreen
- Eye Protection
- Gloves
- Hearing Protection
Preoperational Safety Checks
- Load work vehicle with all required fencing material and tools for the allocated fencing work. Take care to ensure all product is strapped down appropriately. Handle items with care using appropriate PPE
- When loading equipment using safe lifting techniques – use lifting aids, or workmates to help with heavy or awkward equipment
- Check the fence line for hazards prior to work
- Make sure the vehicle is on flat ground before unloading product. If on a slope always unload from the highest point to avoid becoming crushed by falling product
- When dismantling fences, beware of vegetation growth that could make the behaviour of the wire and/or mesh unpredictable. Take particular care with old fences.
Operational Safety Checks
Manual Handling
- Do not attempt to carry too much and adjust the load to suit the site conditions
- When lifting power tools such as an air dolly for driving steelies, use your leg and arm muscles, keeping your back straight
- Tools and equipment must be well maintained with all cutting edges adequately guarded when not in use. It is your responsibility to check this prior to loading, and to refrain from using any faulty equipment
- Do not place hand tools on top of posts, and remove from the power source when not in use
- Organise the delivery of fencing materials to minimise manual handling and use mechanized unloading or teamwork at the prepared site
- Organise the layout of materials on the site to minimise carrying
- Maintain audio and visual communication and adhere to the specified exclusion zones
Operational Safety Checks
Manual Post Driving Tools
- When using peterol support picket by hand and use the dolly once in position
- Keep a firm stance with the feet and legs clear of the dolly,
- When using a dolly, always keep firm downward pressure to avoid damage to the mechanics inside the dolly
Operational Safety Checks
Mechanical Post Driving Tools
- This is a one-person operation
- Once the operator is ready to begin, there must be at least a 1.5meter exclusion zone around the driver by all bystanders. It is strictly prohibited to cross that exclusion zone whilst the driver is in operation as it is a high-risk crush-zone
- If the post driver is mounted to a tractor via a three-point linkage, the tractor must be large enough to remain stable during post driving
- The machine must be properly parked and braked before post driving begins
- There is a risk of flying debris whilst the post is being driven, appropriate PPE in the form of eye protection and ear protection must always be worn
Operational Safety Checks
Barbed Wire
- Always wear protective gloves when handling barbed wire
- When dispensing barb, keep it taut for risk of recoil and entanglement
- Take care to avoid breakage
- Wear safety glasses with barbed wire at all times.
- Never cut a tightly strained barb
Operational Safety Checks
Wire Spinners
- Always wear protective gloves when using the spinner
- Never place your hand in a position for it to become trapped within the coil of wire
- Set the coil in place, centre on spinner and then lock in place using appropriate locking screws
- Feed out the wire slowly to avoid tangles and kinks in the wire – maintain audio contact with your co-workers
POTENTIAL HAZARDS IDENTIFIED
|
Hearing Injury |
Always wear relevant PPE (hearing muffs or plugs). Ensure PPE is being used before beginning work |
|
Hand Injury |
Always wear relevant PPE (protective gloves). Take care when handling barb. |
|
Entanglement |
Never wear loose clothing. Ensure shirts are tucked in, buttoned at the cuff, no jewellery is to be worn and hair is to be tied up. |
|
Eye Injury |
Always wear correct PPE (Protective glasses/goggles) |
|
Crush Injury |
Always remain outside of exclusion zones. Take extreme care around post driver attachments on the tractor. Never place a body part within the crush zone. Only one person to operate the post driver. |
|
Strain |
Only manual lift to your capabilities. Use mechanical aids or multiple individuals to distribute the load |
Please note that no employees are to use this equipment prior to:
- Having practical training under supervision
- Obtaining competency in the correct use
- Demonstrating adequate safety understanding
- Protective Clothing
- Covered Boots
- Widebrim Hat & Sunscreen
- Gloves
Preoperational Safety Checks
- Ensure all gates, latches and chains are in place and have been properly secured and are fun
ctional - Ensure all gates can swing freely and can be securely closed
- Inspect the yards for any trip hazards such as foreign objects, sticks, rocks etc
- Ensure the appropriate ‘wetting down’ of high traffic areas to reduce dust
- Do not perform any tasks in the cattle yards unless you have received training and are deemed to be competent
- Always ensure you understand your role in the yard before work commences
Operational Safety Checks
Drafting
- Drafting should be performed by competent individuals in drafting yards or through gates between yards. The animal must have a viewpoint of their ‘escape route’
- Ensure all workers understand the flow of the yards and the process of drafting
- Work carefully with stock adhering to low stress stock handling techniques (no loud or aggressive behaviour)
- Identify safe points for a quick exit (immediately exit the yards if you feel unsafe)
- Ensure cattle are aware of your position in the yards – never creep up
- Maintain a safe distance between yourself and the stock to avoid being kicked whilst moving between pens or in confined spaces such as the round yard
- When drafting in the round yard, always have your hands securely on the end of the gate – never hold a gate in the middle otherwise you cannot close the gate time efficiently and safely.
- Never open a gate in the round yard when cattle are travelling towards the round yard, as they will baulk and turn around and can cause a safety hazard to the person drafting in the force.
- If a beast with stirry temperament is due to enter the round yard, ensure you are out of harms way in a secure spot out of the round yard. The gate should be open adequately so that the beast can exit the round yard swiftly. Beasts with stirry temperament are identified from the person drafting in the force prior to them travelling towards the round yard. It is important that you are paying close attention so that you are aware in advance. Be aware of the dangers climbing rails in the round yard of overheard drafting sticks. Be aware of the dangers of climbing gates should they open unknowingly.
- Staff working in the forcing pens should have adequate training. Once the cattle are moving in their intended direction, keep up the flow of momentum to keep them travelling in a low stress manner without turning around.
- Never stand behind gates when moving cattle as it is a crush zone. When closing a gate place one foot on the bottom to brace yourself, and close quickly. If it is obvious that cattle are about to turn around or are pressing against the gate, ensure your body is free of the line of the travel of the gate if it is forced open.
- Be aware of potential impalement from drafting sticks when using a crow’s nest (always stand to the side or fully towards the front to enable the sticks to flow freely at your sides and not directly facing a part of your body that they could impale). Always watch what the cattle are doing once they have been let out of a gate. Ensure they do not come back towards the gate. If a pen is full ensure the gate is latched shut securely, and an alternate pen is used for filling.
- Familiarise yourself with the drafting sticks as all gates may open differently and some may take more force to open or close than others. Always ensure you know which gates need to be opened for which type of stock before drafting commences
Operational Safety Checks
Marking/Branding
- Follow instructions to operate calf cradle/cattle crush correctly and safely both to stock and staff. Ensure the head is through the front of the cradle before it is closed. Never begin processing a calf/weiner until you are satisfied, they are securely restrained.
- Maintain a constant flow of cattle to both the cradle and crush. Do so in a low stress manner. Ensure the correct procedure for penning up calves and weiners to minimise kicks and impacts. The further away you are from the rear of the animal the more likely you are to get hurt as they have a greater strike distance than if you are close
- There should be no cattle sticks used whilst penning up. Ensure timely closure of race gates to secure the cattle in a low stress manner.
- Do not place hands through gates, the race, or the slides as there is a risk of crush injury and broken bones. Approach from above with a clear entry and exit point
- Only perform tasks for which you have received training and are deemed to be competent e.g. branding, marking, dehorning. If you are in the process of being trained, ensure you pay close attention to your instructions and watch diligently to your practical demonstrations. It is your responsibility to ask for more guidance and instruction if you do not feel competent.
- Ensure correct technique for holding the back leg for the safety of all workers, in particular the person castrating – if you are feeling fatigued notify your manager/relevant co-worker so that your position can be switched with somebody else. If you are the person castrating, always be aware of the need to retract yourself and the knife if the leg is released unexpectedly. Be mindful of your finger placement whilst cutting. If you do not feel confident that the person restraining the leg is competent, inform your manager or wait until you are satisfied they have a strong and secure grip.
- When processing calves and weiners ensure that the workspace is set up in a suitable location far enough from the cradle to reduce the risk of knock-over by cattle, but close enough to be accessible in a time efficient manner to those performing animal husbandry. Care must be taken towards sharp implements such as scalpels, as well as heated implements such as the brands.
- Ensure the tools are laid out in a manner that they can be reached safely, with sharp edges facing away.
Operational Safety Checks
Cross branding/NLIS reading
- Ensure the NLIS reader is sufficiently charged before use
- Begin a new session for each new batch of cattle
- When placing the reader through the cattle rail towards the NLIS tag ensure it does not hit against any rails as this could damage it and render it useless. Ensure you are keeping a close look at the monitor in regular intervals to ensure it is still in working order, and try to keep a count in accordance with the reader.
- The reader will beep twice to inform you that the tag has been read. If it only beeps once, it is identifying that the tag has already been read.
- If there is no sound when the button is depressed, it means that there is either no NLIS tag or that it is unreadable. Keep a count of how many times this occurs during any session.
- Reading cattle with a wand is most successful when the race is full and stock are secured in the race. If you attempt to read NLIS tags whilst cattle are moving,
- Never use the reader as a prodding stick towards cattle.
- If removing management tags from previous owners of purchased stock, always use scissors – never attempt to remove with a knife due to the danger of cutting yourself.
- All purchased cattle must be cross branded to identify ownership
- The brand is to be located underneath the most recent brand.
Operational Safety Checks
Housekeeping
- Ensure work area is free of excess dirt and debris
- Keep the work area tidy and ensure implements are thoroughly cleaned in a hygienic manner and restored to safe locations.
- Sharp instruments such as scalpels should always be in clearly marked containers securely closed. Other sharp instruments such as horn knives should have secure coverings over the blade to ensure there is no risk of being cut when retrieving items from the branding bag/box.
- Heated tools such as brands should be isolated after use and given time to cool down before they are relocated and packed away.
- For heavy items, ask your co-workers for help to move – never attempt to lift or relocate heavy items by yourself, due to risk of strain injury.
- Wash down any areas as required
- Ensure all gates and locks have been checked and secured before leaving areas of segregation
POTENTIAL HAZARDS IDENTIFIED
|
Crush Injury |
Ensure safe stock handling techniques are being exercised. No loud or aggressive behaviour. Make observations for any stock with stirry temperaments. Always have an exit strategy. Exit the area if you feel unsafe. |
|
Slip and fall |
Prestart inspection of cattle yards. Remove objects which pose a trip hazard. |
|
Kick and strike injuries |
Use careful distancing when penning up calves and weiners. Make observations of stock with stirry temperaments. Use correct technique as demonstrated. Exit the area if you feel unsafe. |
|
Lacerations from sharp objects |
Ensure covers are put onto sharp instruments after use. Ensure scalpel blades are removed after use and disposed of appropriately. Make others aware of their location. Never cut towards yourself. |
Please note that employees are required to:
- Have practical training under supervision
- Obtain competency for particular yard roles
- Demonstrating adequate safety understanding
RIDING A MOTORBIKE
COMPULSARY PPE:
- Protective Clothing
- Covered Boots
- Sunscreen
- Head Protection
- Gloves
Preoperational Safety Checks
- Complete a thorough prestart check of fuel, tyres, guards, chain tension and brakes (lights if applicable)
- Know how to safely load, transport, and unload the motorbike from a vehicle using appropriate restraints and techniques
Operational Safety Checks
Rules
- Never double passengers
- Always tell someone where you are going and your estimated time of return
- Understand the job the motorbike is to be used for
- Always wear a helmet that complies with legislation and is in good working condition
- Advise your supervisor of any mechanical problems and do not ride a motorbike that is not in good repair
- Always carry plentiful drinking water to allow for any scenario
- Always carry a fully charged UHF, making sure it is in good working order before setting off
- Ensure you are aware of your starting location and subsequent directions. Make sure you consult a property map for clarification
Operational Safety Checks
Manoeuvring
- Observe the speed limits around the homestead (10kmph)
- Whilst travelling on station roads you are to drive to an appropriate speed taking into consideration bumps along the way and collision risks such as kangaroos and cattle.
- At all times maintain an awareness of old fence lines. Look out for signs such as old wooden posts, abandoned gateways and wire. Failure to see a fence line could result in serious injury. Greatly reduce speed well in advance on approach. Notify others if they are unaware.
- You must drive no faster than 60 KMPH – GAZETTED/MAIN STATION ROAD
- All other station roads must be ridden with caution.
- Whilst mustering, extra care must be taken when consolidating stock with creeks, dips, cattle pads and trees posing extra danger. You are to use your safety awareness to ride to an appropriate speed where you are in control. You are to ride no more than 60 KMPH as a maximum, but you should always be riding at a slow speed where possible
- Maintain audio and visual communication and adhere to the specified exclusion zones
POTENTIAL HAZARDS IDENTIFIED
|
Mechanical Fault |
Always perform your prestart check |
|
Loss of orientation |
Consult a property map, be confident in your comprehension of directions, always have a fully charged and operational UHF |
|
Collision with stock, fences + other obstacles |
Always maintain a suitable speed. Make constant observations of your surroundings and any potential obstacles or danger. |
|
Crash due to terrain |
Always maintain a suitable speed. Take care when crossing steep creeks. |
Please note that no employees are to use this equipment prior to:
- Having practical training under supervision
- Obtaining competency in the correct use
- Demonstrating adequate safety understanding
- PROTECTIVE CLOTHING
- COVERED BOOTS
- HAT AND SUNSCREEN
- EYE PROTECTION
- HEARING PROTECTION
1. Check that all guards are in place, properly secured, and fun
2. Check all fluid levels and top up if necessary.
3. Ensure that the hitch points, securing pinions and safety chains are secured as required. Check hitch and frame for cracks.
4. Ensure that hydraulic rams, hoses and couplings are in sound condition (no visible leaks), are secured as required and are safe for operation.
5. Ensure that all lights and warning devices are operational.
6. Check all tyre pressures and ensure tyres are not damaged, cracked or spiked.
7. Grease entire machine and ensure all guards are secured after greasing.
8. Make sure windows and mirrors are clean before using and that you have a firm footing while cleaning.
9. Faulty equipment must not be used. Report suspect machinery immediately.
OPERATIONAL SAFETY CHECKS
1. Maintain 3 points of contact as you climb into tractor.
2. Ensure park brake is on.
3. Inspect cabin floor and stow away loose objects to ensure no interference with operation.
4. Turn the key to on position and sound horn before starting the engine.
5. Inspect all instrumentation for correct operation.
6. Carry out operation check of steering brakes and hydraulics if hooked up to an implement.
7. When filling tractor with diesel ensure engine is off and park brake is on. Ensure filler cap is clean before opening and secure when tank is filled.
8. OPERATE THIS VEHICLE AS PER THE OPERATOR MANUAL INSTRUCTIONS AT ALL TIMES.
9. When moving on internal farm roads do not exceed 40 km per hour on farm at any time.
10. Outside road travel do not exceed 60 km per hour at any time.
11. If there is an implement attached, only travel to the SOP rated speed which will set the tractor speed.
12. Ensure all locking devices are in place when moving.
13. Survey area to be worked by making sure that there are no water pipes, trees, buildings, power lines or other obstacles in the work site.
14. Check slope of the land to ensure vehicle is safe from roll over. Clear area of obvious hazards.
15. ONLY complete a task as per the work order or instructions.
17. Always look over both shoulders when reversing.
18. When backing up to an implement and a person is helping you, make sure that they are not standing between you and the implement at any time that the tractor is running.
19. When operating do so as to be in the guide lines of both tractor and implement at all times.
20. At completion of task, place all control levers in neutral position, apply park brake, turn off engine and remove keys.
21. Maintain 3 points of contact when you climb down from the tractor.
22. At the completion of operation, clean all machinery with high pressure cleaner or air compressor if needed. Ensure all the proper protective clothing/equipment is worn during cleaning operation.
1. Contact with or entanglement with fences, power lines and other machinery.
2. Entanglement in a PTO drive shaft.
3. Rough ground conditions, debris and foreign objects hidden in work area (or darkness).
4. Machinery guards not properly fitted, secured or damaged during operation
- Protective clothing
- Covered boots
- Hearing protection
- Eye Protection
1. DO NOT OPERATE THIS CHAINSAW UNLESS YOU HAVE READ THE OPERATOR MANUAL. USE THE CHAINSAW AS RECOMMENDED IN THE OPERATOR MANUAL AT ALL TIMES.
2. Ensure the machine is clean to help identify loose, worn or defective parts and other safety hazards.
3. Inspect fuel lines, tank, and area around carburettor for fuel leaks. Do not use the chainsaw if leaks are found.
4. Check the effectiveness of chain brakes and operating controls.
5. Ensure safety guards and other fitted safety features are secure and fun
6. Check condition of the anti-vibration mountings of the handles.
7. Ensure that the chain is sharp and correctly tensioned.
8. Faulty equipment must not be used. Report suspect machinery immediately.
9. DO NOT PROCEED if you have not been trained and Assessed as competent to use a chainsaw. You should be in good physical condition to operate the chainsaw.
10. DO NOT PROCEED to use a Chainsaw to Fell Trees.
OPERATIONAL SAFETY CHECKS
1. Follow all safety precautions in the Manufacturer’s Safety Manual – improper use can cause serious or fatal injury.
2. When starting the chainsaw:
Start the chainsaw resting on the ground:
a. Ensure no obstructions are present particularly near the tip of the guide bar.
b. Place the right foot through the rear handle and place the left hand on the front handle.
c. Operate the starter with the right hand.
d. Keep a firm grip on the chainsaw with both hands, with the thumb of the hand holding the front handle wrapped around the handle.
4. Maintain a proper balance and secure footing when operating the chainsaw.
5. Start the cut with the saw chain rotating at full speed and the spiked bumper in contact with the wood.
6. Be aware of the position of the guide-bar nose at all times when the saw chain is in motion.
7. Pay full attention to the operation and be alert for movement of the material being cut.
8. Be alert to situations that may cause material to pinch the top of the saw chain.
10. Avoid the accumulation of debris and keep the chainsaw clean.
11. Never use a chainsaw over or above shoulder height.
12. Allow a hot chainsaw to cool before refilling the fuel tank.
HOUSEKEEPING
1. Remove any foreign material from the motor and guards.
2. Clean entire chainsaw at completion of task.
3. Sharpen saw chain as per manufacturer’s recommendation and as required.
4. Service motor as per manufacturer’s recommendation.
5. Keep the work area and implement shed in a clean and tidy condition.
POTENTIAL HAZARDS
1. Crush injury - Use recommended cutting techniques and stand away from fall zones when operating chainsaw.
2. Cuts and lacerations - Use chain lock when motor running and not cutting. Avoid moving chain and avoid kickback as per operator manual. Wear PPE (Chaps and Gloves) as recommended by the Manufacturer
4. Flying debris - Use recommended PPE and move bystanders away from operation worksite.
5. Eye injury - Wear eye protection as recommended PPE at all times.
6. Loose clothing, entanglement - Remove jewellery and loose clothing. Wear recommended overalls or Protective Clothing including Chaps and Gloves.
NO PERSONNEL ARE TO USE THIS EQUIPMENT PRIOR TO OBTAINING:
• COMPETANCY IN THE CORRECT USE OF THE EQUIPMENT
• READING AND FULLY UNDERSTANDING THE OPERATOR’S MANUAL
• READING THE STANDARD OPERATING PROCEDURE
• UNDERGOING THOROUGH PRACTICAL TRAINING WHILE PROPERLY SUPERVISED
• SUPERVISOR TO SIGN OFF FOR WHEN EMPLOYEE HAS MET ALL THE CRITERIA LISTED IN THIS SOP
- Protective Clothing
- Covered Boots
- Eye and hearing Protection
- Gloves
- Face Shield
1. Check workspaces and walkways to ensure no slip/ trip hazards are present.
2. Ensure all guards and safety shields (spark deflectors) are in position before starting the grinder.
3. Check that electrical cords are not damaged.
4. Ensure that the grinding wheels are properly ‘dressed’ and that wheels do not touch the tool rest and that the gap between wheel and rest is no greater than 1.5 mm.
5. Check that grinding wheels are running true (regularly dressed) and are not glazed or loaded.
6. Locate and ensure you are familiar with the operation of the ON/OFF start switch and the Emergency Stop button (where fitted).
7. Faulty equipment must not be used. Immediately report and repair any damaged machinery.
OPERATIONAL SAFETY CHECKS
1. Stand to the side of the wheels when starting up.
2. Let the wheels gain maximum speed before starting to grind.
3. Do not grind on the side of the wheel.
4. Small objects must not be held by hand.
5. Workpiece must never be held with gloves, cloth, apron or pliers.
6. Never leave the machine running unattended.
7. Do not bend down near the machine whilst it is running.
8. Never force the workpiece against a wheel.
9. Slowly move the workpiece across the face of the wheel uniformly. Do not use the side of the grinding wheel to grind workpieces.
10. Coolant spilt on the floor should be immediately cleaned up with absorbent material.
HOUSEKEEPING
1. Switch off the grinder at the end of work and switch off at power point.
2. Check that power leads have not been damaged during use.
3. Clean swarf and leave the machine in a safe, clean and tidy state.
1. Hot metal – use appropriate tools to manage heat
2. Sparks – fit spark arresters
3. Noise – wear approved hearing protection
4. Eye injury – wear approved eye PPE
NO PERSONNEL ARE TO USE THIS EQUIPMENT PRIOR TO OBTAINING:
COMPETANCY IN THE CORRECT USE OF THE EQUIPMENT
READING AND FULLY UNDERSTANDING THE OPERATOR’S MANUAL
READING THE STANDARD OPERATING PROCEDURE
UNDERGOING THOROUGH PRACTICAL TRAINING WHILE PROPERLY SUPERVISED
SUPERVISORS TO ENSURE SOP’S ARE SIGNED OFF
- Protective Clothing
- Covered Boots
- Eye and Hearing Protection
1. Check compressor and motor oil levels and top up as required. (For petrol powered motor and electric powered compressors). Refer to operator manual.
2. Examine power lead for obvious damage (for electric motor compressors)
3. Check that drive belt and pulley guards are fitted, secure and fun
4. Check the drive belts are properly tensioned.
5. Examine all air hoses, connections and couplings.
6. Check any air tools and accessories for serviceability.
7. Locate and be familiar with ON/OFF controls.
8. Faulty equipment must not be used. Report faulty machinery immediately.
OPERATIONAL SAFETY CHECKS
1. Start the compressor noting the pressure gauge increase and the cut-in / cut-out pressure levels.
2. ALWAYS OPERATE AS DIRECTED IN THE OPERATOR MANUAL.
3. Listen for any air leaks from all airlines or hoses. Do not continue if there are any leaks.
4. Adjust the pressure regulator to suit the particular work requirements.
5. Always check these pressures at regular intervals during normal operation.
6. Air hose connections must be secured and checked prior to being pressurized.
7. If portable, position the compressor unit in an area that will not disturb or obstruct the workshop environment.
8. Use compressed air power tools responsibly and within manufacturers’ recommended guidelines.
9. Compressed air cleaning of machine parts must only be undertaken after all PPE and general workshop safety precautions have been observed.
10. Never use the compressed air to clean down work benches, floors or dust from clothing.
11. Never kink or cut off an air hose to restrict the flow of air.
12. Never direct compressed air towards the body.
13. When inflating tyres, inflate in 5 PSI (34.5 kpa) increments.
14. Do not stand in front of tyre walls or leave inflating tyres unattended.
15. Only inflate split rim tyres in a tyre cage.
16. DO NOT fill / refuel hot motor or with motor running.
1. Clean away any oil and debris from in and around engine and compressor when job complete.
2. Keep the work area in a clean and tidy condition.
3. Roll up hoses at end of work and store handles to avoid damage.
4. Check and drain air tank and lines for water as per manufacturer’s recommendations.
5. Check compressor motor for lubricating oil.
6. Ensure drive belts are tensioned as per manufacturer’s recommendation.
POTENTIAL HAZARDS
1. Noise & dust - Move the air compressor outside or move bystanders. Wear hearing/eye protection
2. Electricity - RCD circuit, check cords
3. Compressed Air - Do not point towards any body part. Avoid exposure when checking hoses for leaks.
NO PERSONNEL ARE TO USE THIS EQUIPMENT PRIOR TO OBTAINING:
COMPETANCY IN THE CORRECT USE OF THE EQUIPMENT
READING AND FULLY UNDERSTANDING THE OPERATOR’S MANUAL
READING THE STANDARD OPERATING PROCEDURE
UNDERGOING THOROUGH PRACTICAL TRAINING WHILE PROPERLY SUPERVISED
SUPERVISOR TO ENSURE THE SOP’S SIGN OFF
- PROTECTIVE CLOTHING
- COVERED BOOTS
- HAND PROTECTION
- EYE PROTECTION
1. Wear proper clothing and Personal Protective Equipment (PPE).
2. Ensure this OXY welder has a suitable safe work area.
3. Ensure the equipment is fitted with appropriate flash arrest (blow back) arrest system.
4. Keep the area clean & free of grease, oils & flammables.
5. Hoses and regulators to be inspected and in good condition.
6. Ensure the area is well ventilated (with fume extraction if required).
OPERATIONAL SAFETY CHECKS
1. When setting up, check that the oxygen and acetylene regulator adjusting knobs are closed (OFF), and are loose.
2. Check that both handpiece blowpipe valves are closed.
3. Slowly open the cylinder valves on each gas cylinder by half a turn (180°) only – for a faster emergency shutdown.
4. Screw in the regulator adjusting knobs slowly until the delivery pressure gauges are both correct.
5. Purge the oxygen gas line and check for constant gas flow. Re-adjust delivery pressure if necessary.
6. Then purge the acetylene gas line and check for constant gas flow. Re-adjust pressure if necessary.
7. Open the acetylene blowpipe (handpiece) valve very slightly and light with a flint lighter ONLY.
8. Continue to slowly open the acetylene valve until the correct flame length is achieved.
9. Slowly open the oxygen blowpipe (headpiece) valve until a neutral flame is produced.
10. Always be very aware of the dangers of a naked flame.
11. Note: When shutting down, always close the acetylene blowpipe valve first.
HOUSEKEEPING
1. Ensure both gas bottles are off and the welder secured with bottles stored upright at completion of work.
2. Leave the work area in a safe, clean, & tidy condition.
3. Ensure torch tips are cleaned as per manufacturer’s recommendations.
1. Explosion
2. Burns
3. Eye Injury
4. Fire and Explosion
- Protective Clothing
- Protective Footwear
- Gloves
1. Ensure all guards are fitted, secure and fun
2. Ensure there is a suitable fire extinguisher within 5 m of the fuelling area.
3. Identify and ensure you know how to operate emergency fuel cut-off switches and valves
4. Ensure the vehicle engine is turned off before refuelling.
5. Check there are no lit cigarettes, open flames, mobile phones or electronic handheld devices or other sources of spark or static in the vicinity while fuelling.
6. Check the fuel tank placard to ensure you are filling with the correct fuel.
7. Examine all fuel hoses, connections and couplings and make sure there are no leaks.
8. Locate and be familiar with ON/OFF switches, taps and controls.
9. Ensure fuel nozzle is operational before starting the motor and pump.
10. Faulty equipment must not be used. Report suspect machinery immediately.
OPERATIONAL SAFETY CHECKS
1. Remove the filler cap. Avoid dust getting into the fuel tank.
2. Ensure the area is well ventilated when fuelling vehicles or equipment.
3. Once started, note the pressure uptake in the fuel hose.
4. Immediately report any leaks that are observed. Turn off pump if required.
5. Keep the metal fill nozzle in contact with the lip of the tank to eliminate any static accumulation.
6. Adjust the nozzle trigger to suit the particular fuel flow requirements.
7. Always check the fuel flow at regular intervals during normal operation.
8. Never kink the fuel hose to restrict or cut off the flow of fuel.
9. Report any fuel spills immediately and begin use of spill response/ recovery kit.
10. If fuel splashes onto clothing, remove and allow for fuel to evaporate completely outdoors before washing. Thoroughly wash clothing before re-use.
1. Use a proper fuelling nozzle or funnel to avoid splashing fuel on the engine or frame of the equipment.
2. Fill slowly and listen to air coming out of the can as the fuel pours in. As the can nears the full level, air will come out faster, and the pitch will get higher. Stop before the tank is full. Leave 5 percent empty to allow for expansion of the tank.
3. When the tank is full, let the fuelling nozzle drain for a few seconds before removing it from the fuel port to prevent dripping.
4. Replace the filler cap.
1. Avoid spillage on equipment or ground. If you have a spill, you MUST report to your supervisor or the person in charge.
2. Spills are to be contained immediately. Use peat, oil dry or similar product on small spills.
3. Fuel spilled on hands or exposed skin shall be washed with soap and water as soon as possible,
4. Wipe up any spills or drips and allow any damp spots around the motor to evaporate before attempting to start the equipment.
5. Lock up any unattended pump to store portable fuel cans in a well ventilated area away from open flame or sparks.
MAITENANCE
1. Remove any rubbish or foreign material from filling area.
2. Clean the entire area at completion of task.
3. Service pump and equipment as required as per manufacturer’s recommendation.
4. Keep the work area clean and tidy.
POTENTIAL HAZARDS
1. Fire and explosion - No smoking, naked flame or ignition sources
2. Absorption - Apron, gloves and safety glasses
3. Inhalation of fumes - Ventilate area
4. Splash injuries - Cut off nozzles, PPE